.png) |

2019-07-26 |
.png)
|
Maria P.
passion to career
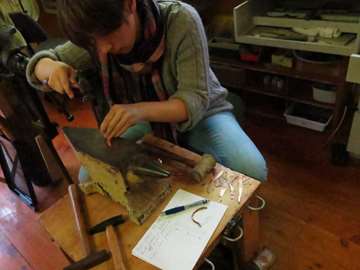
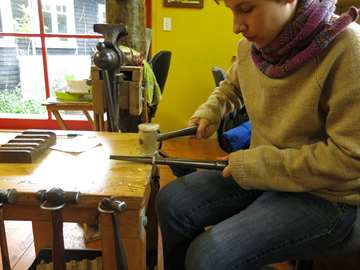
Custom tuition in the Titirangi BushThis page documents in pictures what was studied, practiced and achieved in individual private tuition sessions under my tutoring at Bush Jewellery Studio. In May 2013 Maria arrived with a strong desire to begin learning how to make jewellery. She started individual tuition with custom sessions here at Bush Jewellery Studio. It became a comprehensive study of jewellery-making skills and materials. Weekly or fortnightly sessions were scheduled and we paused/restarted them for any time spent away, or any other reason. This way no sessions were lost. Here I will try to show the range of work she achieved. Maria also aimed to work from home and over the time she was here she built up a collection of tools and equipment for her home-based workbench. During the early sessions, the basics, she proved to be a careful and accurate maker; repeating exercises to develop her skills. This page shows her progressing quite quickly to complex rings and multi-bezel necklaces both I think inspired by her own sources of historical jewellery.
|
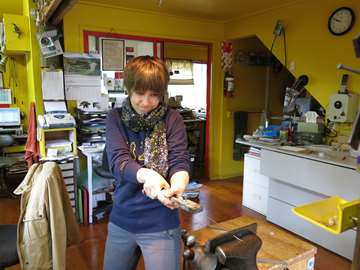
LapidaryGemstone work was a natural progression. In fact she inspired me by the high polish she got with my simple lapidary equipment.
|
A taskIn mid-2015 I introduced a task: to design earrings which can be made quickly. I hoped she would see the benefit of designing out techniques that take time, using joins which reduce impact on materials, and to produce variations. To develop a range of simple, attractive and saleable jewellery. She began with toolmaking: cast unique bronze stamps, brazed stainless bolts to them and pressed high-relief textures onto a variety of metal shapes. The shaped she cut with tool steel pancake dies. Anodised titanium and niobium became the colours and silver the contrast.
|
Self-employmentNow Maria is a self-employed designer/maker, photographing and promoting her jewellery with growing success.She says, "Setting up a home work shop was a joint family effort".
By the end of 2018 Maria graduated from her sessions at Bush Jewellery Studio.
She was an agreeable part of our studio for quite a few years; we enjoyed her company
as did our bench hands and other students. This page shows the enormous progress she
has made.
Maria's media images (a selection).png)
.png)
.jpg)
.png)
.png)
.png)
.png)
.png)
Much development has happened at home as well...
|


.JPG)
.JPG)
.jpg)
.JPG)
.JPG)
.jpg)
.JPG)
.JPG)
.JPG)
.JPG)
.JPG)
.JPG)
.JPG)
.JPG)
.JPG)
.JPG)
.JPG)

.JPG)
.JPG)
.JPG)
.JPG)
.JPG)
.JPG)
.JPG) A lapis ring is finished
A lapis ring is finished
.JPG)
.JPG)
.JPG)
.JPG)
.JPG)
.JPG)
.JPG)

.JPG)

.JPG)
.JPG)
.JPG)
.JPG)
.JPG)
.JPG)
.JPG)
.JPG)
.JPG)


About Bush Jewellery
I teach individuals in custom one-to-one sessions,
and small classes by arrangement, often teens. The main benefit of
one-to-one is accelerated and intensive learning. When you
come here you'll see it's a functioning jewellery studio
with teaching facilities added in.
Outside the class modules we're both available for discussion,
to talk about any other aspects of a small jewellery-making business.
If you're interested in providing yourself with a kick-start,
or boosting your practice with advanced bench tips and tricks,
or you'd like a jewellery and pencil drawing mentor for your teenager,
please contact me here
or here and arrange a visit.
Meet me and see our studio workshop.
Brian Adam
silver and gold jeweller
Bush Jewellery Studio (est.1995)
Independent tuition, ancient and modern,
low-tech, hand-tech and lateral,
all ages ... even post-grad
Titirangi, Auckland, New Zealand
|
Brian Adam |
www.adam.co.nz/bushjewellerytuition/graduates/maria |